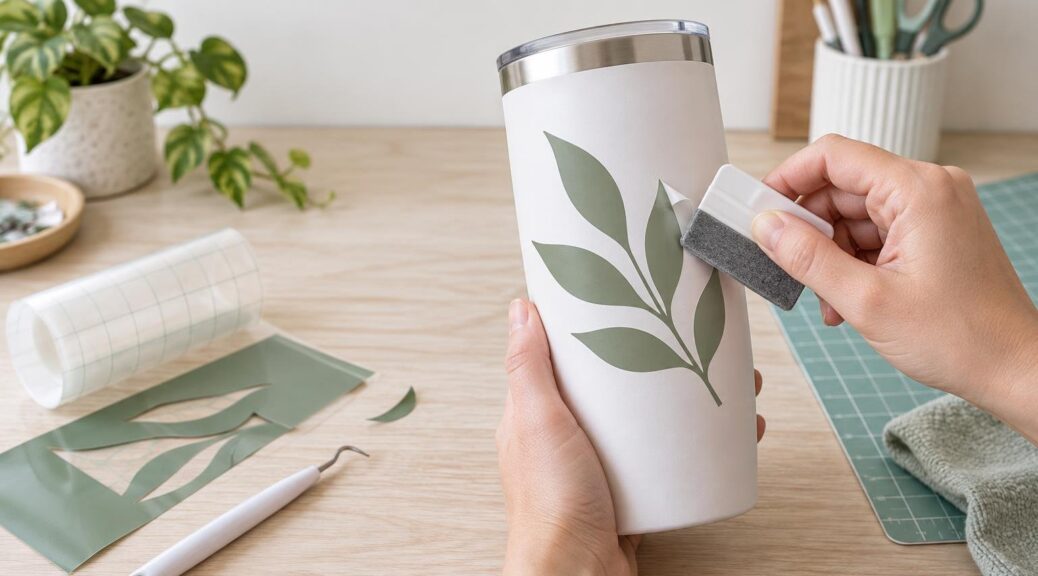
TLDR: If you are wondering why vinyl decals lift at the edges and how to prevent it, start with contact. The adhesive needs a clean, compatible surface and firm, even pressure. Contamination, the wrong vinyl, aggressive curves, application tension, cold conditions, and washing too soon can all weaken that contact. Clean and dry the blank, choose vinyl for the surface and intended use, burnish from the center outward, peel transfer tape back at a low angle, and let the decal stabilize before washing.
The timing of the lift is your best clue. Vinyl that rises while you remove transfer tape usually needs better burnishing or a slower peel. A decal that lifts the next day may be reacting to contamination, temperature changes, tension, or an incompatible surface. Peeling after washing points toward trapped air, insufficient waiting time, harsh wash conditions, or a material that was never a good match for the blank.
Why vinyl decals lift at the edges and how to prevent it
A vinyl decal stays put when enough adhesive makes stable contact with the blank. Corners, narrow points, and tiny lettering are usually the first places to fail because they have little adhesive area and are easy to catch during transfer or cleaning.
The most common causes are straightforward: dust or oil under the adhesive, moisture on the blank, residue from a cleaner or old label, vinyl that does not suit the surface, incomplete burnishing, stretched vinyl, a difficult curve, low application temperature, or premature exposure to water and heat. “Permanent” vinyl can improve the material match for long-term projects, but the label does not mean it will adhere successfully to every plastic, coating, texture, or shape.
Diagnose the problem by when the lifting starts
| When it lifts | Likely cause | Best next move |
|---|---|---|
| During transfer-tape removal | Incomplete burnishing, transfer tape pulled too quickly, or small details not gripping the blank | Lay the tape back down, burnish the problem area, and peel slowly at a low angle. |
| Within a few hours | Surface contamination, moisture, cold application conditions, or tension in the vinyl | Check the blank and environment. Redo the decal if the edge will not remain flat after gentle re-burnishing. |
| The next day | Incompatible surface, strong temperature change, or vinyl fighting a curve | Test a small piece of the same vinyl on the blank before remaking the complete design. |
| After washing | Washing too soon, trapped bubbles or folds, high heat, steam, or weak compatibility | Review the vinyl maker’s waiting and care guidance. Replace badly wrinkled or repeatedly lifting decals. |
| On fabric | Standard adhesive vinyl was used where heat-transfer material is needed | Use compatible HTV or iron-on and follow its material-specific heat instructions. |
Start with a clean, compatible surface
Apply adhesive vinyl only to a clean, completely dry blank. Cricut and ORAFOL both call for clean surfaces, while ORAFOL specifically notes that dust, grease, and other contaminants can affect adhesion. Pay special attention to areas touched during handling. A mug can look spotless while still carrying skin oil near the rim or around the handle.
Remove old label adhesive and other visible residue before application. If you use a cleaner, make sure it is appropriate for the blank and does not leave a film. Let the surface dry fully, then avoid touching the application area. Do not assume that adding stronger adhesive over contamination will solve the problem; the decal still needs direct contact with the blank.
Smooth, sealed glass, ceramic, and metal are generally easier starting points than heavily textured, porous, rubbery, soft-touch, or unknown coated surfaces. Compatibility can still vary, so a material description alone is not a guarantee.
Some plastics are especially challenging. The 3M substrate selection and preparation guide identifies polyethylene and polypropylene as low-surface-energy substrates and recommends adhesion testing to determine film performance. It also notes poor adhesion to rubber and caulking materials. If you cannot identify the plastic or coating, apply a small test shape and leave it for at least a day under the conditions the finished project will face.
Choose vinyl for the job, not just the color
Use removable adhesive vinyl when temporary removal is part of the plan. Use permanent adhesive vinyl when the design is intended to remain in place and the product is suitable for the blank. Cricut distinguishes permanent vinyl from removable vinyl by intended use, and ORAFOL describes ORACAL 651 as a permanent-adhesive film intended for flat and simple curved applications.
That last detail matters: permanent adhesive does not turn a sharply tapered cup, textured storage bin, silicone sleeve, or oily plastic into an easy surface. When the blank is the problem, switching to another permanent vinyl may not be enough. Test a different blank, simplify the decal, or use a product made for the specific substrate.
For apparel and other fabric projects, do not treat ordinary self-adhesive craft vinyl as a substitute for heat-transfer vinyl. HTV uses heat and pressure to bond according to material-specific instructions. Cricut’s fabric preparation guidance includes prewashing without fabric softener and following the applicable heat settings. Adhesive vinyl and HTV require different workflows even when both are cut on the same machine.
Apply the decal without stretching or trapping air
Good application technique creates even contact without pulling the design out of shape. Cricut advises attaching a small area first, burnishing outward with a scraper, and removing the transfer tape at an acute angle. Its guidance also warns that bubbles and folds can contribute to lifting after washing.
A reliable application sequence
- Position the decal and secure one small section rather than dropping the whole design onto the blank at once.
- Press from the anchored area outward. Use overlapping scraper strokes to push air away from the center.
- Burnish fine lettering, sharp corners, narrow lines, and the entire outer edge with extra care.
- Peel the transfer tape back over itself slowly instead of pulling it upward and away from the surface.
- If a detail rises with the tape, stop. Lay the tape back down, burnish that spot, and resume the low-angle peel.
- After removing the transfer tape, gently re-burnish the decal through its release liner or another clean protective sheet. Do not scrape directly across delicate exposed vinyl.
Avoid pulling the transfer tape hard enough to stretch the vinyl. A stretched letter or stripe may appear flat initially but try to return toward its original shape later, placing stress on its corners and ends.
Simplify designs on curves
A flat decal has to distort to follow a compound curve. The sharper or more complicated the curve, the more likely the film is to wrinkle, bridge over a low spot, or remain under tension. ORAFOL describes ORACAL 651 for flat and simple curved surfaces rather than every possible three-dimensional shape.
On tapered cups and bottles, keep the design away from the steepest transition. Smaller, separated elements usually conform more easily than one large rectangle or a long line crossing the curve. A compact wordmark may work where a wide border does not. If the decal repeatedly develops the same lifted edge, treat that as a shape or placement problem rather than reaching automatically for more pressure.
Watch temperature and give the adhesive time
Cold vinyl becomes less flexible, and cold adhesive may not make reliable initial contact. ORAFOL says its films generally should not be applied below 46°F unless the relevant product sheet specifies otherwise. It identifies approximately 65–75°F as the best application range and recommends keeping newly applied graphics in the application environment for at least 24 hours. Those figures are ORAFOL guidance, not universal specifications for every craft vinyl, so check the instructions for your material.
Avoid major temperature changes immediately after application, especially on curved projects. ORAFOL notes that significant changes during the first day can contribute to lifting or popping in complex curved areas. In practical terms, do not apply a decal in a cold garage and immediately move it into a hot kitchen, or decorate a chilled bottle and expect the adhesive to behave as though both materials were at room temperature.
Prevent peeling after washing
Follow the vinyl manufacturer’s waiting and care instructions rather than relying only on the blank’s label. A dishwasher-safe cup does not make every decal-and-adhesive combination dishwasher resistant.
For its vinyl projects, Cricut advises waiting 24–48 hours before dishwashing. It recommends using the top rack and avoiding heated-dry, sanitize, and steam cycles for the longest-lasting results. Other vinyl products may specify different care, so use the guidance for the exact material whenever it is available.
Before washing, inspect the decal for bubbles, wrinkles, raised points, and incomplete edge contact. Water and repeated handling can exploit those small openings. Hand washing gently and avoiding prolonged soaking may be the safer choice when the material or blank has no documented dishwasher guidance.
Can you save a decal with a lifted edge?
A tiny, newly raised edge may be recoverable if the surface beneath it is still clean and the rest of the decal lies smooth. With clean hands, lower the edge without stretching it, cover it with a release liner, and burnish gently. Then leave the project undisturbed in a stable environment.
Redo the decal if the edge repeatedly rises, dust has reached the adhesive, a large section has wrinkled, or the vinyl is visibly stretched. Also redo it when you discover that the material is wrong for the surface. Adding household glue around a peeling edge can create a messy border without fixing contamination, tension, or poor substrate compatibility.
If an intricate decal keeps failing during transfer, the practical answer may be to simplify the cut or change how it is produced. This guide to deciding when to cut a vinyl decal yourself or order a transfer decal can help with that choice. Full-color artwork and repeated small designs may also be better suited to professionally produced custom stickers than layered craft-vinyl pieces.
The cleanest next step
Identify the blank before cutting another decal. Is it smooth or textured, sealed or porous, flat or sharply curved, and made from a known or unknown plastic? Then choose permanent, removable, or heat-transfer material according to the actual surface and use.
For an uncertain blank, cut one small test shape from the intended vinyl. Prepare and apply it exactly as you would the final design, leave it undisturbed for at least 24 hours, and then check the corners before committing more material. A tiny test is much easier to redo than a detailed decal wrapped around a full tumbler.
Clean contact, compatible materials, low-tension application, and patient aftercare prevent most edge-lifting problems. If the test decal still peels, change the surface, material, design, or placement. More scraping cannot make an incompatible combination reliable.